Tuesday, May 31, 2011

Razzleberry Friends

Over Memorial Day weekend, our family spent some relaxing time at the Lake. I brought a few--just a few!--stamping supplies with me, and worked on developing my monochromatic style.

I'm pretty sure I promised someone (besides Mary--see earlier posts) a set of handmade cards. Now, if I can just remember whom to send them to...

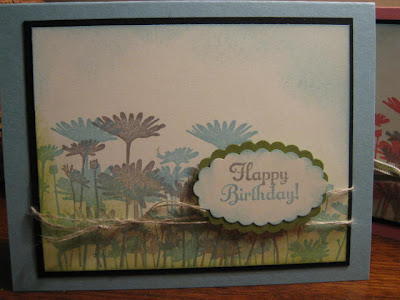
All three of these desings are very simple, and none uses any fancy or time-consuming techniques. My colors are Rich Razzleberry (sorry that my images have such a brown tint, it is really more of a purplish berry color), Crumb Cake and Very Vanilla.

For the first card, I used a Rich Razzleberry base, and put the fold on the left side. I like to do this sometimes for a "landscape" style layout, because then the card will sit up a bit longer before the fibers tire and the card slumps. The cute little tree image is from Forest Friends, and the sentiment is from Best Yet (retired). The Scallop Border Punch is a fast and easy way to create a bit of dimension to the mat.


I wanted to really focus on a CAS style for these next two designs, and starting with a Very Vanilla card base helps. Simple image panels and mats, embellished only with paper piercing and some fibers, allowed me to finish these cards in a very short time and with a minimum of clutter on my work surface.

I left the insides of both cards blank, but couldn't resist using the sentiment from the Happy Together stamp set on my owl-and-bunny card.


I hope you enjoy these cards, and maybe you will find some inspiration here, too! Check back soon for another set of monochromatic cards featuring Tangerine Tango.

Thursday, May 26, 2011

Blue Birds

Some tricks I use to streamline my card-making are to copy layouts, re-use my own designs, stick with a defined color combination and focus on one or just a few stamp sets.

I copied this design from a card I found at Splitcoast. I wanted it to be both quick to make as well as very mailable, so I eliminated embellishments. To give the card dimension, I relied on sponging, a few layers (not raised, though), and paper piercing.


Here's a sympathy card. I like to keep these simple, and in muted colors. Baja Breeze, Crumb Cake and Very Vanilla fit the bill nicely. The layout is another one I found online. This is the second card I've made with this format. As you can see, both the color combination and stamp set are repeated from the card shown above.


The Easel Card is a tried-and-true fold for me, and it is easily dressed up by using the Top Note die. Linen Thread keeps the card upright for display.


Just one panel with a few stamped images and some sponging makes this card super fast to assemble as well as flat for mailing. The Linen Thread embellishment gives the design a bit of pizzazz without making the design over-the-top or too feminine.


I love that I can pull out a few of my tools, a few colors of card stock and ink, and come up with a set of cards like this in a short time. It's a great way to relax, and it makes a useful and heartfelt gift.

Thanks for looking, and I hope you like the cards!

Wednesday, May 25, 2011

A Spotlight for Mary

A friend offered to give a handmade gift, with some "pay it forward" stipulations, so I am making a gift of handmade cards for another friend. I'll share some of them here.


This Paris-themed card was inspired by the VSN challenge to use the Spotlighting Technique. This is a favorite technique of mine, because it is a super simple and quick way to put a new twist on an old image.

Here I've stamped the Eiffel Tower (from Artistic Etchings) in VersaMark ink, and embossed with white ep on Chocolate Chip card stock. I stamped the image a second time using Pink Pirouette on Whisper White, punched out with the 1 1/4" Circle Punch, sponged with Chocolate Chip and then popped up with a Stampin' Dimensional.

The background panel has several images from the same set in various inks: Chocolate Chip, Daffodil Delight and Pink Pirouette. More sponging there, too, of course.

I saw another card this weekend online that had the panels tilted, and I remembered how fun that is to do, so I used that idea on this card as well. The brown ribbon is from a gift box, and the white is SU!'s Satin Ribbon.

Stay tuned! I'll post more of this collection soon. Thanks for checking out my blog!

Sunday, May 22, 2011

May VSN (eta: "I won!")

I won't have much time for recreational stamping this weekend, but I will squeeze in a few cards for the May 2011 VSN: Pirate theme!

One time-saver for me this weekend will be to use the leftovers from my LNFI-benefit Stamp-a-Stack I held at Ann's house on Tuesday evening. I prepped 10 sets of card stock for each of 4 different cards. Since we had 8 ladies attend, I have a few cards all ready to go.

Of course, I want to change things up a bit, so these cards are sometimes substantially different from the cards we made on Tuesday. I'm using the same dimensions for the most part, as well as sticking with the color combinations.

For all three cards here I used Salut a toi, the French version of Hello Again. I earned this set free during this year's Sale-a-Bration promotion. It is cute and simple.

For this first card, I changed the original image (I had used Upsy Daisy) and added Linen Thread, but left everything else the same. This color combination and layout really work for me.


Here I changed both image and layout a bit. This CAS card uses "inchies" mounted on 1 1/4" scallop squares for a trio of images. The spunky Daffodil Delight Pom Pom Trim is attached with Crystal Effects.


Finally, this Side Step card is a little simpler that the original one I made last week, and it has a more upbeat feel. I kept the sponging and pearls, but added stamped and matted panels to the side steps this time. I like it equally as much as my original.


* I won! I love it when my card is chosen for the VSN Honors Gallery. Yippee! My Side Step card was chosen this time around, for the "ARRR" challenge (Regal Rose, Rose Red, Repeated image, Recycled elements, Row of pearls).

Thursday, May 5, 2011

Happy Mother's Day!

Here at Ruttger's I've had a quiet room to myself in the evenings. Of course, I've put my time to good use!

I thought a Mother's Day card or two would be a fine choice for my evening's activities, so I pulled up the tutorial for the Side Step Card over at Splitcoaststampers.com, and got down to business. This card looks very complex, but is surprisingly quick to make.


I made my own background using the small flower image from Belles attentions (French language Because I Care Hostess Set), stamped and sponged with Pretty in Pink, Regal Rose and Crumb Cake.

The hydrangea blossom is inked with Blushing Bride and Pear Pizzazz markers, and sponged with Pink Pirouette and Crumb Cake. I'm continually impressed with my Paper Snips--I couldn't have trimmed this image with just any scissors.

The Scallop Trim Border Punch and a grouping of Basic Jewels pearls helps make my Side Step card extra special.

The second card I made tonight is super simple, and I was really just CASEing myself here. Everything is pretty self-explanatory.


My favorite part about the design of this card is that no measurements are needed for the panels--just eyeball it and cut! A close second in the fun department is using the Color Spritzer Tool to add some dimension.

A happy Mother's Day to all my friends, and especially to those of you who are moms. Also a big thanks to my friends and co-workers Pam and Michelle for playing with me tonight! It is always more fun to stamp together.

Wednesday, May 4, 2011

Two for One

You know how I love a challenge, and stamping challenges are some of the best.

Here's one that is always fun: choose a layout and make two different cards. I made two simple birthday cards using a pretty basic layout. One is "feminine" and the other, "masculine." I was inspired by the CreativeCrew monthly challenge for SU Demonstrators over at splitcoaststampers.


For both cards, I used a stamp set that is a favorite with me and many of my stamping friends: Upsy Daisy. The bold image works really nicely for two-tone stamping like I've done here, and is perfect for several fun techniques such as Emboss-Resist and Faux Dry Embossing.

The sentiment is from the current Hostess Set Something to Celebrate. I selected the clear mount option when I earned this set, and that ws perfect for what I wanted to do here. Even though the words are in one line on the stamp, it was a snap to align them with "Birthday!" under "Happy" because of the clear mount feature.

These cards use Baja Breeze/Old Olive or Regal Rose/Certainly Celery card stock and ink, and both have Encore Silver ink and Very Vanilla and Basic Black card stock. As an accent on the masculine card, I used Linen Thread, and on the feminine card, Old Olive 1/4" tafetta ribbon.

I punched the sentiment panels (after stamping) with the Scallop Oval Punch. The mats are actually two Scallop Ovals together behind the sentiment.

Of course, I added some sponging to my image and sentiment panels. I love sponging!

I've got openings for Workshops in May and June, and I'd love to come make some fabulous cards with you and your friends. Contact me to book your Workshop, and don't forget that May is National Scrapbook Month, so SU has some fun specials running. Check out www.stampinup.com for details.