Showing posts with label embossing folder. Show all posts

Wednesday, March 21, 2012

Happy for Butterflies, Happy for You

Here is my personal favorite card that I made for the recent Virtual Stamp Night (VSN) at splitcoaststampers.com.


This challenge was to use a spring element somewhere on the card; I used a coiled wire as the body of the large butterfly.

A lot of the cards I made for this VSN were much simpler than this, and in general I've gotten away from a lot of fancy layers in much of my card making. Sometimes it just feels good to really lay it on, though! This design has six layers (including the butterflies), dry embossing, lots of sponging and both the wire embellishment and some half-back pearls. Both the butterflies and the dry embossing are courtesy of Stampin' Up!'s fabulous Big Shot die cut machine. I (well, actually DD#2) cut Marina Mist card stock with the Butterflies die, and then I used the ever-popular Vintage Wallpaper embossing folder and sponging (Marina Mist ink) to add texture to both butterflies and mat.

The Always Artichoke swirl is from Baroque Motifs, and the sentiment ("I am glad there is you") is from a set of rub-ons that I've had for years. I really like the bright, crisp look of the rub-on on top of the Always Artichoke card stock.

I sent this card home with my sister at the end of her almost 6-week stay while Mom recovered from surgery. It is for her partner, who graciously made do on her own all that time. I am truly glad that there is her!

I liked this design so much that I reprised it in more Spring-like colors and with gold sponging as an Easter card. It also was a featured project at our March Stamp Club meeting.

Wednesday, January 25, 2012

Wax Paper Embossing Folder Resist

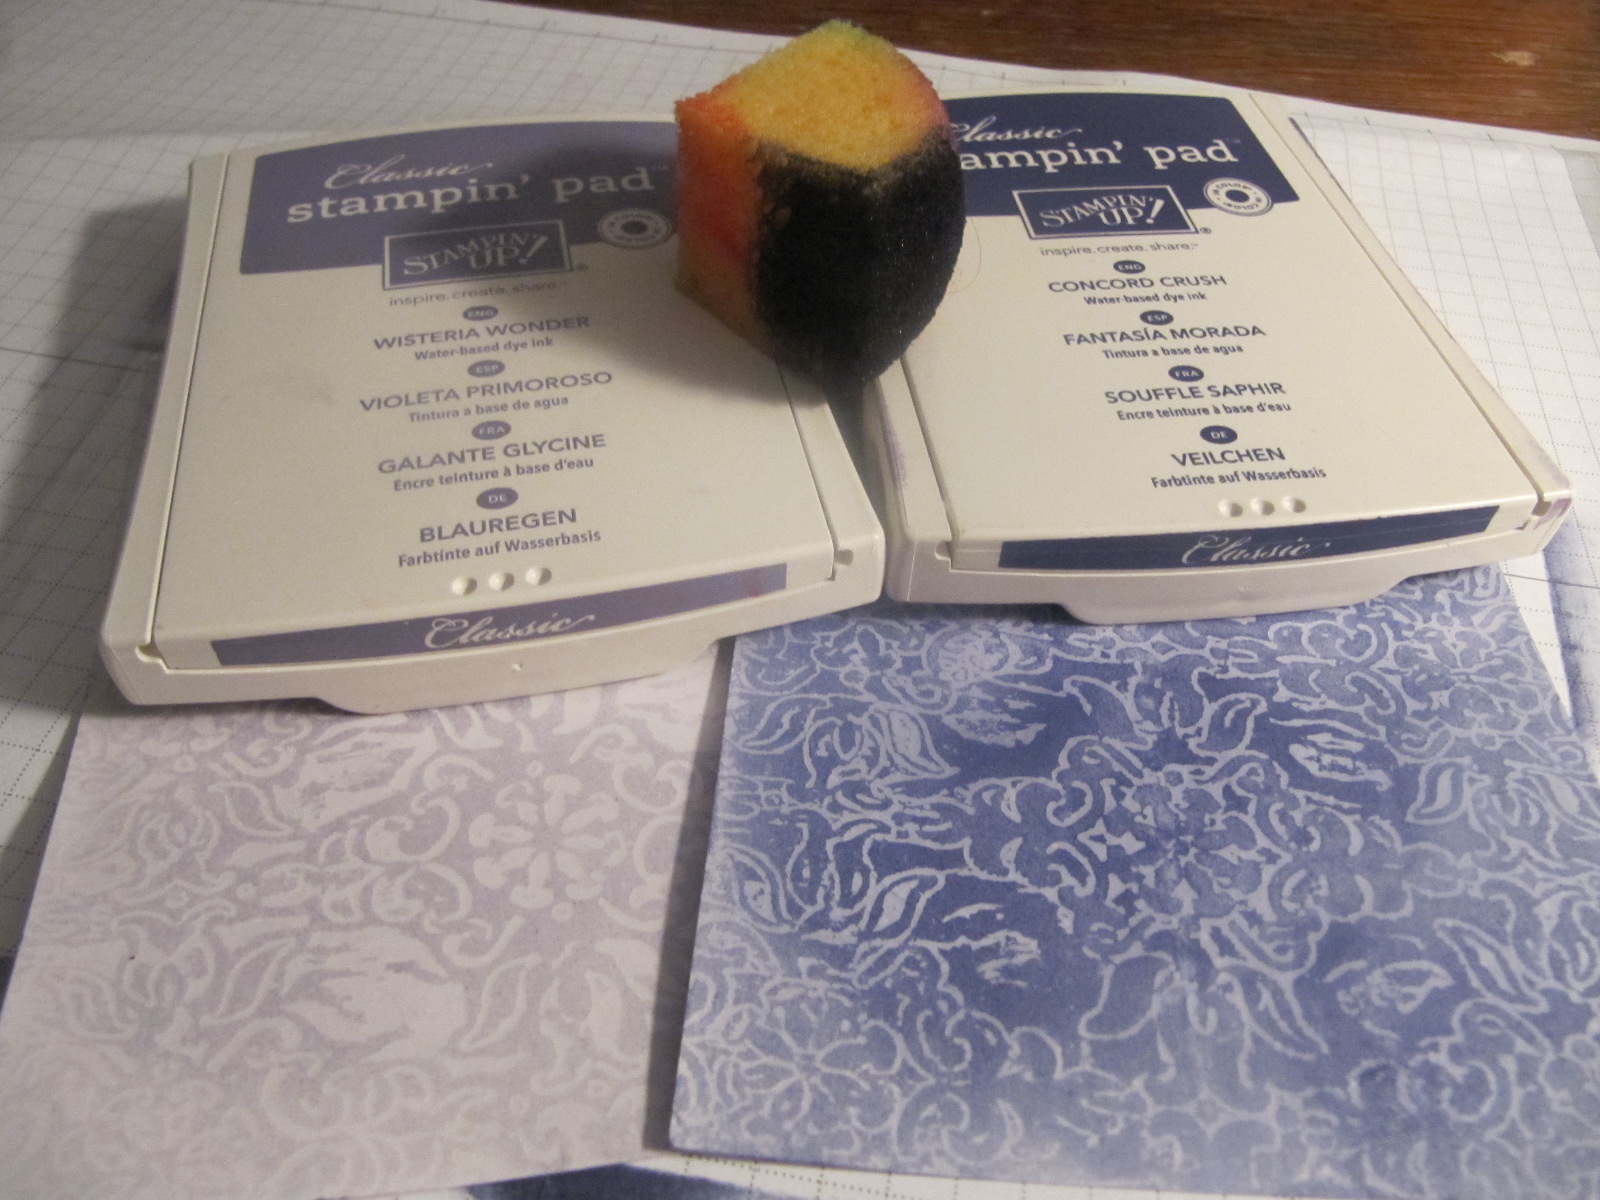
Here is a quick tutorial for the Wax Paper Embossing Folder Resist technique that my Stamp Club practiced last weekend. At each meeting, we make several projects, including a 6" x 6" page with technique directions and an example.


The sample above uses Melon Mambo and Pretty in Pink. I chose Concord Crush and Wisteria Wonder for the tutorial example.

1. Place a piece of wax paper inside your Embossing Folder. (For both my projects, I used the very popular Vintage Wallpaper folder.) Make the Big Shot sandwich (platform tab 1 + cutting plate + folder (with wax paper) + cutting plate), and run through the BS.

2. Place the wax paper between two pieces of Glossy White cs (glossy side facing the wax paper). Using plain paper to protect your iron, heat the cs and embossed wax paper. This will transfer wax in the pattern of the embossed design to the Glossy cs. (Experiment to find the right heat setting and time. Too little will not transfer the design; too much will transfer all of the wax.)


3. Use Stampin' Sponges to add Classic ink to the Glossy cs. If using more than one color, work from light to dark. (For the sample above, I used both light and dark inks on the lighter squares, and only the darker ink on the darker squares. In this example, I used either light or dark, but did not mix.)


4. Trim your Glossy cs to the size and shape you want and finish your project.


The images and sentiments on this card are from the Love & Sympathy stamp set.

I hope you'll give this technique a whirl. I love the way the colors pop out when I'm adding the ink to the embossed image. The effect is especially dramatic with deep, rich colors. Enjoy your stamping time!

Tuesday, January 24, 2012

Wax Paper Valentines

I'll post a tutorial soon of the Wax Paper Embossing Folder Resist technique that my Stamp Club learned last weekend. I can't think of a better use for your iron!

Here are two Valentines I made with some scraps that were left over. I designed the card with the Easel fold, which has a unique look but is really very straightforward (not much harder than a regular fold-in-half card, really).

For this first card, I used squares of the Glossy card stock that I had doctored up with the Vintage Wallpaper embossing folder, wax paper, ironing and sponging. I used two squares that are inked with Melon Mambo Classic Ink and two that have Pretty in Pink. The Full Heart Punch of Whisper White card stock with a sentiment from Grateful Greetings stamped in Melon Mambo ink completes the focal point and message. I added a little extra bling by dabbing the stamp with Champagne Mist Shimmer Paint before stamping.


Here's the card I made to take as my sample. Since I was concerned about running out of Glossy card stock, I used an odd-shaped piece and cut it into strips instead of squares. I like this look, too! I curled the edges with my Bone Folder, and secured the strips with Mini Glue Dots to make sure they weren't going anywhere. The heart on this card is punched from Shimmery White card stock, and the sentiment is pretty hard to see, because I stamped only with the Shimmer Paint. (It is better IRL.)


I hope you'll be inspired to make some of your own Valentines this year. If you see some products you like, please let me know, and I can help you order online or can place an order for you. Happy Stamping!