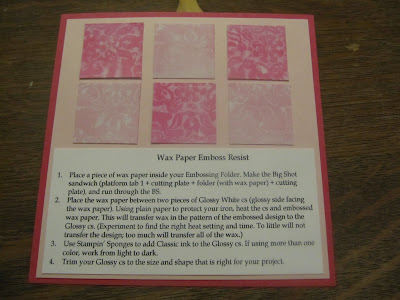
Here is a quick tutorial for the Wax Paper Embossing Folder Resist technique that my Stamp Club practiced last weekend. At each meeting, we make several projects, including a 6" x 6" page with technique directions and an example.
The sample above uses Melon Mambo and Pretty in Pink. I chose Concord Crush and Wisteria Wonder for the tutorial example.
1. Place a piece of wax paper inside your Embossing Folder. (For both my projects, I used the very popular Vintage Wallpaper folder.) Make the Big Shot sandwich (platform tab 1 + cutting plate + folder (with wax paper) + cutting plate), and run through the BS.
2. Place the wax paper between two pieces of Glossy White cs (glossy side facing the wax paper). Using plain paper to protect your iron, heat the cs and embossed wax paper. This will transfer wax in the pattern of the embossed design to the Glossy cs. (Experiment to find the right heat setting and time. Too little will not transfer the design; too much will transfer all of the wax.)
3. Use Stampin' Sponges to add Classic ink to the Glossy cs. If using more than one color, work from light to dark. (For the sample above, I used both light and dark inks on the lighter squares, and only the darker ink on the darker squares. In this example, I used either light or dark, but did not mix.)
4. Trim your Glossy cs to the size and shape you want and finish your project.
The images and sentiments on this card are from the Love & Sympathy stamp set.
I hope you'll give this technique a whirl. I love the way the colors pop out when I'm adding the ink to the embossed image. The effect is especially dramatic with deep, rich colors. Enjoy your stamping time!


No comments:
Post a Comment